How to Use Facebook’s Scheduling Feature
Looking to schedule one or more Facebook statuses to appear on your page’s wall at another date and time? Thanks to Facebook’s recent scheduling feature, page administrators can now schedule as many updates as they want to be posted at a past or a future date. For administrators, this tool can greatly reduce the amount of time that they must spend on Facebook each week, as well as ensure that statuses updates are posted regularly- which is essential to a business on Facebook.
What is Facebook scheduling?
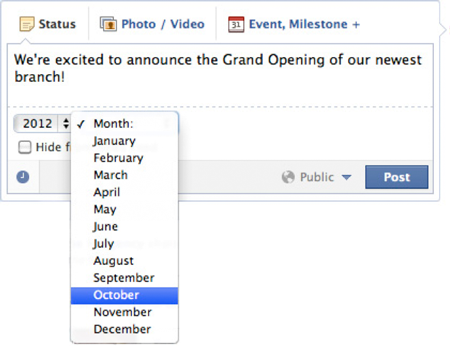
The scheduling button is a clock icon located in the bottom-left corner of the status update screen. When you click on the button, you will first see an option to choose the appropriate year. Once a year is chosen, you can select a month, and date. For future dates you can also select a given time for the status to be posted.
If you wish to backdate a post, you would do the same; except you will not be given the option to choose a specific time. However, for backdated statuses Facebook allows you the option to hide your post from the newsfeed.
You can check your scheduled posts by using the activity log. To do this, click the “Edit Page” dropdown menu at the upper-right hand corner of the page. Then choose the “Use Activity Log” option. From here, you can edit the time that an update is scheduled to be posted, or you can delete a post.